

3 Steps to start working with PropellerAds Smartlinks by using PeerClick

- March 11, 2019
- by Affbank Team
- Reviews: 0
Hello everyone!
We have an extremly useful guide for you on how to set up campiagns using PeerClick tracker. You can watch video or read the intsruction! Note, that in the end you'll get a nice bonus to your account ;)
Step 1: Set Up PropellerAds Traffic Source in PeerClick
Step 1. Adding PropellerAds as a Traffic Source in PeerClick
To add Propeller Ads to PeerClick open the Sources tab and click New. Choose Propeller Ads from the catalogue and press Add. Propeller Ads postback URL and all the available macros will be automatically added to the Source. Don't forget to mark the checkbox Enable postback
Step 2. Starting a Campaign in PeerClick
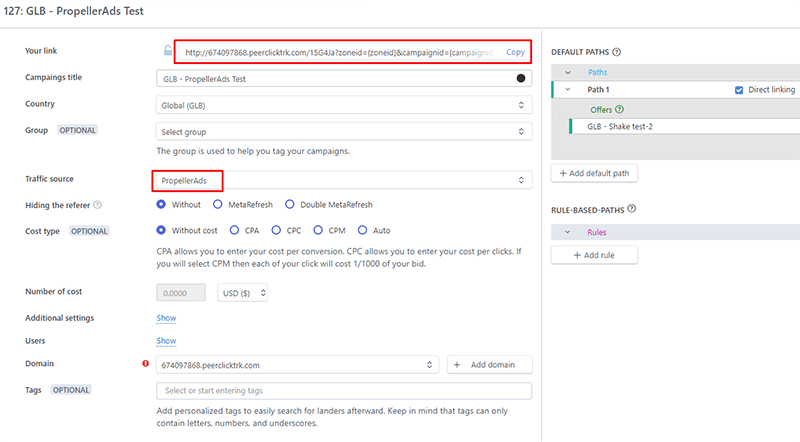
Now that we have our Traffic Source in place, it is time to set up a new campaign. In PeerClick, go to the Campaigns tab and click New. Submit all the relevant details, such as your desired Campaign Name, Landing Page and the offer(s) associated with this campaign. Choose Propeller Ads as Traffic Source and click Save.
Your Campaign URL will be generated automatically. You may remove the macros you don't wish to use. The only obligatory parameter for conversion tracking is external_id. Copy the link to clipboard.
Step 3. Setting Up Postback to pass conversions to Propeller Ads
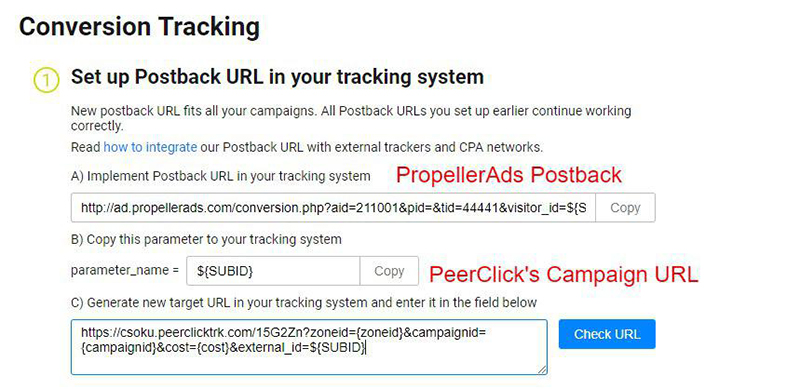
Now, it is time to make sure that conversions get passed to your Traffic Source. Log into your Propeller Ads Advertiser account and open the Tracking tab. There you will see your personal Postback URL link.
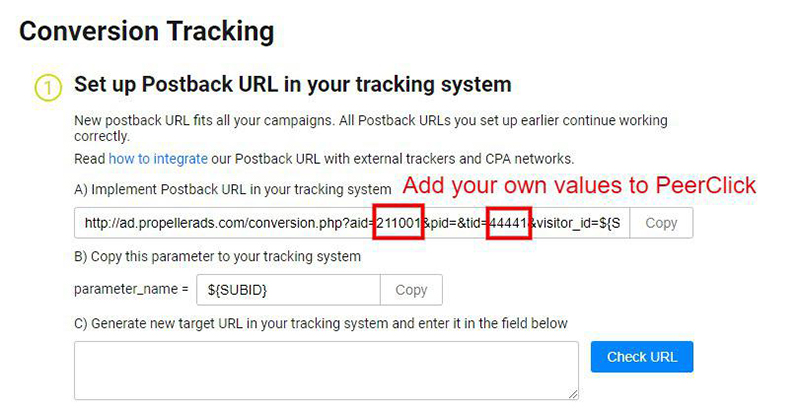
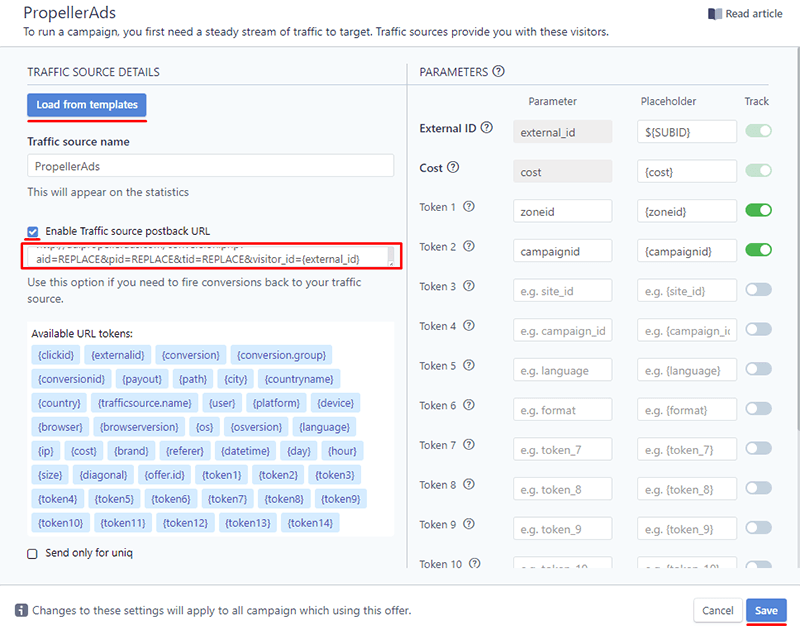
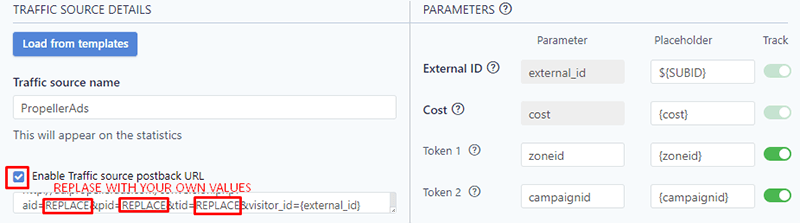
Edit the Postback URL template in your PeerClick account with the actual values from Propeller Ads. Scroll down to the Postback section and click Add. The Postback template will be populated automatically. However, in order to complete the setup, you need to replace certain parameters with your own unique values that were obtained from your Propeller Ads account. And mark the checkbox Enable postback
Step 4. Launching a campaign in Propeller Ads
In your Propeller Ads account, open the Campaigns tab and click the Create Campaign button. Fill in all necessary information about your campaign. Paste the Campaign URL you copied in Step 2 in the Target URL field.
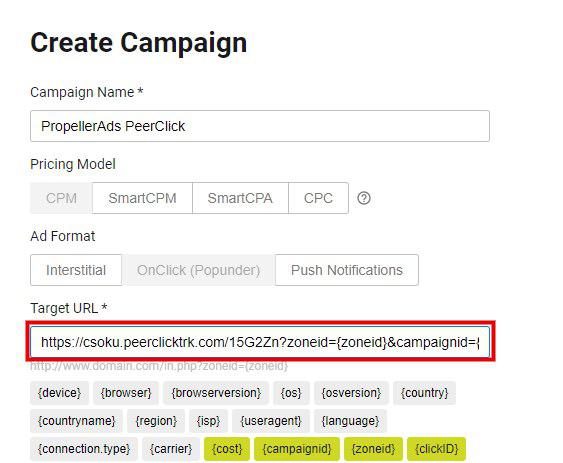
Click Start Campaign. If you go back to Tracking tab, you will be able to test your Campaign URL and make sure you have set up everything correctly. Just paste the link into the corresponding field and press Check URL button.
Now you’re all set! Optimizing your Propeller Ads campaigns will be easier than ever with PeerClick. Once again, all it takes is 4 steps:
1) Add PropellerAds to your list of Traffic Sources
2) Set up a campaign in PeerClick
3) Transfer Postback values from Propeller Ads to PeerClick
4) Launch a campaign in Propeller Ads
Hope this guide improves your experience and allows you to make the most out of your offers! Happy tracking!
Step 2: Set Up PropellerAds Smartlink in PeerClick
Step 1. Adding PropellerAds Smartlink as a Network in PeerClick
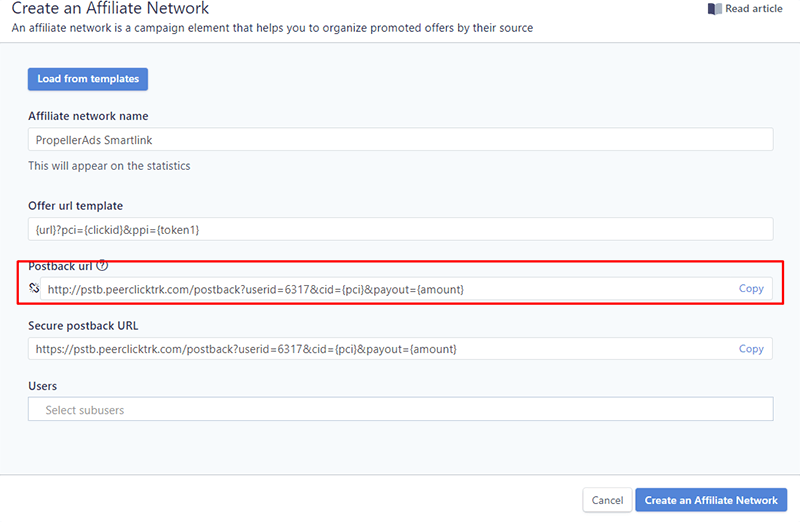
The first step is to add PropellerAds Smartlink as an Affiliate Network in PeerClick. Go to the Networks Tab in your PeerClick account and click New. Since PropellerAds Smartlink is already included in the PeerClick Networks database, just Load from a template and click Add. The data will be filled in automatically. Copy the Postback URL template and click Save.
Step 2. Obtaining Smartlink in PropellerAds
Go to Smart links tab and push Create Smart Link select your desired Smart LInk, select a Landing page and push Get tag. Now you can add a postback from Peerclick, copy the postback from the previous step. And copy the Smart link URL to the clipboard, we will add it to Peerclick at next step.

Step 3. Creating an offer in PeerClick
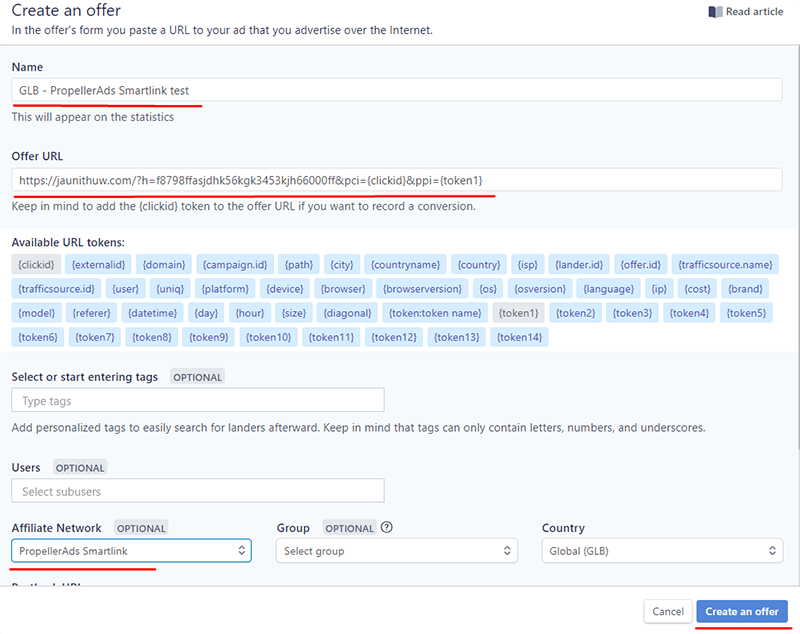
Copy the Smartlink and return to your PeerClick account. Go to Offers tab and click New. Fill in the relevant details, such as your desired Offer Name, paste your Smartlink into the URL field, choose PropellerAds Smartlink as Affiliate Network. Postback URL will be filled in automatically, and the {clickid} will be added to your Offer URL automatically, specify GEO and click Save.
Peerclick info: Please note that GEO is for reference only and not used for traffic filtering or distribution. All traffic filtering and distribution settings are done in the Campaign tab.
Step 3: Creating and launching a campaign in PeerClick
Step 1. Create Campaign in PeerClick

Step 2. Go to the Campaigns section.
Step 3. Click the New button.
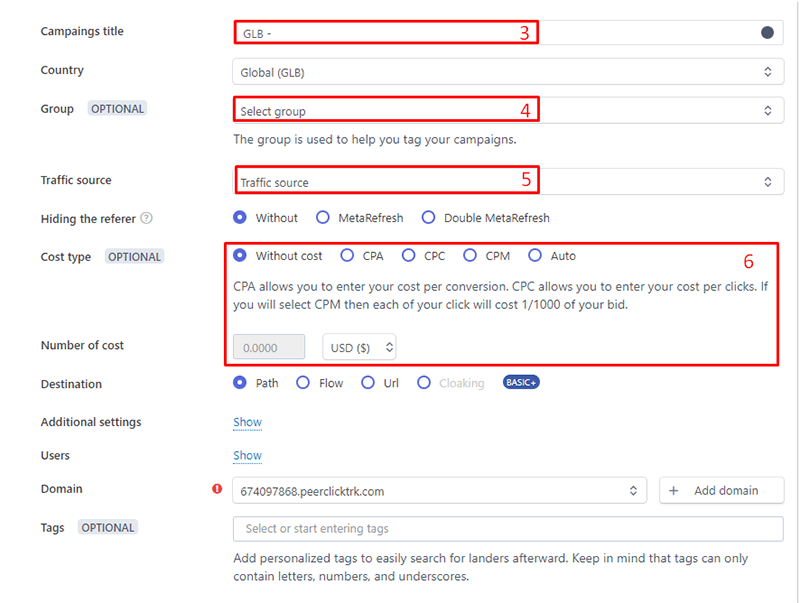
Step 4. Choose the name of the campaign
Step 5. Select the group for your campaign or add the new one if you need it
Step 6. Select the traffic source. In our example, GoogleAd.
Step 7. Set a value per click. Don't worry about mistakes. At any moment you can update the clicks settings using the Update costs function.
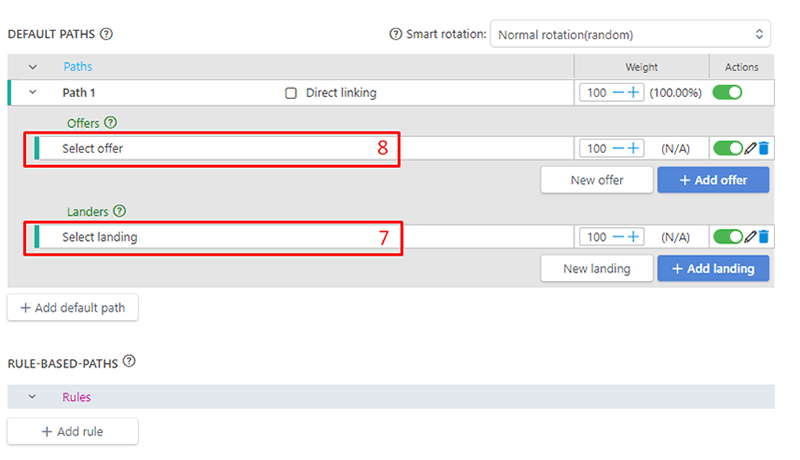
Step 8. Choose between the option to use your landing page, or just to send the traffic without it directly to the offer. If you want to use a landing page, click on Landing, you will see a dropdown menu. Here you can easily find your landing page. As soon as you have chosen it, it will appear on the edit page of the campaign. If you don’t want to use it, choose direct link.
Step 9. Click Offers and a dropdown menu will open. Choose your offer and it will be added to the page.
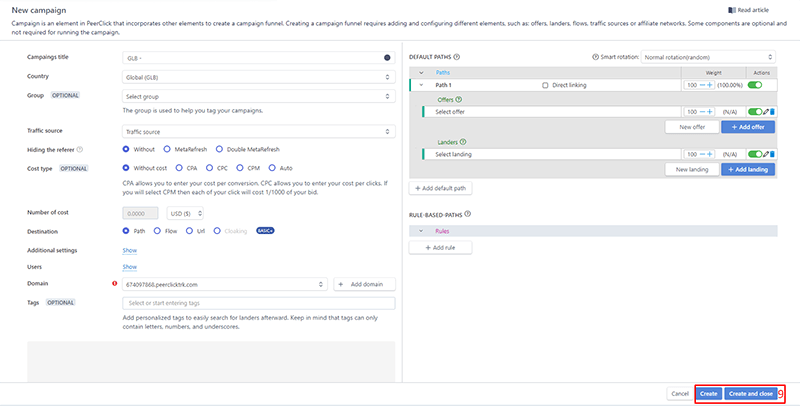
Step 10. Press the Create or Create and close . And copy your link
FOR 50$ TOP UP USE PROMO CODE PROPELLER-AFFBANK
Recent Posts
May 15, 2026
ProfitOn Review: Publisher-First Ad Network for Smarter Website Monetization
ProfitOn is a publisher-first ad network for website owners who want stable traffic monetization wit...
Read moreApril 30, 2026
Case Study: Scaling a Forex Telegram Channel to 1.79 ROAS with Meta CAPI
Case study on how a Forex affiliate fixed Telegram funnel attribution by moving conversion tracking...
Read moreApril 30, 2026
Case Study: Scaling an iGaming Telegram Channel to 2.53 ROI with CAPI
Case study on how an iGaming affiliate improved a Telegram funnel by replacing click-based optimizat...
Read more
Written by
Affbank Team
Hey there! We combined years of experience, a ton of enthusiasm and our hunger for knowledge to give you the best that we can - Affbank. Leave a comment or reach us by email support@affbank.com